Vanilla Cake Traybake

White vanilla cake iced with buttercream and sprinkles.


Ingredients

• 150g Butter
• 150g Caster Sugar
• 3 Medium Free Range Eggs
• 1 teaspoon vanilla extract
• 150g Plain Flour
• 1 teaspoon baking powder
Method


Preheat your (fan) oven to 170 degrees Celcius. Line your baking tray with greaseproof baking paper.
In a large bowl beat the butter and sugar until they are light and fluffy. Add the eggs one by one, beating after each addition to make sure they are well combined. If the mixture starts to curdle, add a tablespoon of flour.
Pour in the vanilla extract, beat for a minute until it’s mixed into the batter. Finally, add the flour and baking powder, beat lightly until it becomes a pale, smooth mixture. Pour the cake mixture into the pre-lined baking tray, no need to smooth out the edges this will happen naturally during the baking process. Bake for 20 minutes until golden brown on top.
Remove from the oven and allow to cool before icing and enjoying.

Porridge Bars Or Flapjack Bars

porridge oats, golden syrup, and salt

Recipe: Porridge Bars Or Flapjack Bars

Ingredients
• 125g margarine
• 125g soft brown sugar
• 100ml/g golden syrup
• 450g rolled oats (make sure these are gluten free if you are catering for a gluten free diet)
• Pinch of salt

Method
1. Melt the margarine, sugar, and golden syrup together on a low heat until the sugar crystals are dissolved.
2. Pour in the oats and salt, stir until well coated in the mixture.
3. Press into a lined tin firmly (see the notes below about the tin size and resulting texture).
4. Bake in the oven at 180oC for 20 minutes.
5. Once baked, impress the bar lines into the hot mixture (carefully). Cover with a teatowel and allow to cool completely before lifting from the tin and breaking into chunks.

Recipe Notes:
I make these bars super thick so that they are fudgy and chewy rather than crunchy and brittle. Make them in a bigger tray if you prefer your bars crisp.

You might note that I am using Stork rather than butter in this recipe in the video. Making the bars plant based makes them last longer and dairy free – this accommodates certain dietary requirements in my house. By all means, sub out the Stork for butter or Coconut Oil, whichever you prefer!

The same applies for golden syrup. Maple syrup is fine as a substitute, it’s just far more expensive than golden syrup and this recipe is on a budget.

Add in soaked raisins, sunflower seeds or any other topping that you like. This is a basic recipe that you can play around with.

Raspberry Bakewell Tart Recipe

Raspberry Bakewell tart with shortcrust pastry and almonds


Serves 10-12 Adults

Ingredients
• 1 roll premade shortcrust pastry
• 125g butter
• 150g caster sugar
• 3 medium eggs
• 125g self raising flour
• 125g ground almonds
• 2-3 drops almond flavouring
• 200g raspberry jam
• 125g flaked almonds

Method

1. Preheat the fan oven to 160 degrees Celsius.

2. Line a baking tin with the pastry. Patch up any holes – you can see here that my roll of pastry wasn’t the right shape but that was grand. Prick the pastry, then line with some baking parchment. Pour some baking beans/dried beans/clean coins into the baking parchment. Spread evenly. Bake in the oven for 15 minutes. After 15 minutes remove from the oven and set the tray to one side while you prepare the filling.

3. Using an electric mixer, beat together the butter and sugar until combined, then add the eggs. Beat again. Next add the flour and ground almonds, followed by the almond flavouring. You will be left with a stiff batter.

4. Spoon the raspberry jam into the par-baked pastry case, spread evenly. Gently spoon the cake batter on top, making sure there are no gaps in the tart for the jam to escape.

5. Smooth the top of the cake batter. Sprinkle the flaked almonds on top of the cake batter and gently press the almonds onto the top so that they stick to the batter.

6. Bake in the oven for 35-40 minutes until the cake area is cooked through. It should be golden on top and if you use a skewer or a cocktail stick to test, it should come out clean.

7. Remove the tart from the oven and leave it to sit to one side for at least 15 minutes before removing from the tin, slicing, and serving.

8. Enjoy with lashings of tea, maybe some cream on the side.

Recipe Notes:
Yes this freezes so it’s a perfect make in advance tart.
Use whatever jam you prefer.
I only use free range eggs because that’s my preference.
The tin I use here is 30cm x 12cm with a removable base.
If you have a nut allergy you can substitute the 125g of ground almonds for more self raising flour. Do not use the almond flavouring.

Crispy Slice Recipe

marshmallow and rice cake


Ingredients
300g marshmallows
300g of crisp rice cereal
75 margarine
1 teaspoon of vanilla extract

Method
On a very low heat melt the margarine in a large saucepan. Line a baking tray well with non stick baking parchment.

Once melted, pour in the marshmallows and keep on stirring on a low heat until all have melted and there are no lumps. Stir in 1 teaspoon of vanilla extract.

Pour in the crisp rice in thirds, stirring after adding each section so that they are completely covered with the marshmallow mixture. Once all the crisp rice has been stirred in and coated with the marshmallow remove from the heat and pour onto the lined baking tray.

Spread the mixture over the baking tray and press down firmly. Leave in a cold place to cool.

Slice with a sharp, wetted knife to stop it from sticking to the marshmallow slices. Slices will keep in a sealed box for up to a week, if they last that long!

Baked Chicken & Rice Recipe

Serves 6 hungry adults

Ingredients
1 tablespoon oil
700g chicken thigh fillets (boned and skinless)
Salt & Pepper
1 large onion, diced
1 pint vegetable or chicken stock
2 large peppers, diced
2 tablespoons Tikka Masala Spice Paste
300g basmati rice
1 tin coconut milk
Flaked Almonds to serve


Method
Take a heavy bottomed pan (with a lid) and heat to medium with oil in the bottom. Sear off the chicken in the pan until coloured then remove the chicken and put to one side on a plate.
Cook the onions until a little softened in the pan juices, add a little vegetable stock to help loosen the caramelised pieces. Then add the peppers and tikka masala paste. Stir well so that the paste begins to cook out on the heat.

Pour the dry rice directly into the pot and cook dry ( this is important) so that the rice begins to toast slightly in the heat. Turn off the hob. Pour stock into the pot and stir, make sure that the liquid is not boiling or simmering. Add the coconut milk and stir slowly until combined. If the liquid is too hot the milk will split.

Add the par-cooked chicken to the saucepan and stir one last time. Put the lid on and cook in the oven at 170 degrees for 25-30 minutes.

Toast the flaked almonds on a dry pan until golden.
Serve the rice dish with the flaked almonds on top. Fresh coriander if you have any as well.
I like to stir in some frozen peas for the last 3 minutes of the cooking process but you might prefer spinach or eating it plain as it is!

Crispy Oven Chicken


There are a couple of tricks to making the most crispy oven chicken so listen up!

1. You’re going to use your herbs and spices twice. Whatever you choose, use some in the marinade and some in the flour mixture before breading the chicken.
2. Use buttermilk to tenderise your chicken. You will soak your chicken in the buttermilk and herbs/spices mixture for about an hour before cooking.
3. Strain the buttermilk into some beaten eggs when breading the chicken.
4. Use skinless boneless chicken thighs for perfectly moist chicken, rather than chicken breast which can get tough and dry. This is cheaper per kg to buy too!
5. Use Panko breadcrumbs which means you won’t need any oil for this crispy oven chicken.

The herbs & spices I’ve used here are dried coriander, garlic powder, cayenne pepper, white pepper, dried sage, salt, black pepper. By adding to each layer of the cooking process you get a more rounded result and you’ll use less salt overall. Which is always a good thing.

Cook in the fan oven at 190 degrees for 25 minutes. Yes, you can also cook this chicken in the air fryer. Cook at 180 degrees for 17 minutes, check with a temperature probe to make sure it’s cooked through and safe. Remember, 75 degrees to stay alive!

I got my Panko breadcrumbs at the Asian Supermarket in Ballymount a few weeks ago. I make the trip about once a month to stock up on ingredients. Always a happy customer, but you can also shop from them online

Jam Tarts

This is not a complicated recipe but more of a reminder that jam tarts are incredibly easy to make at home plus taste so much nicer than shop bought.


Use a roll of ready-made pastry. Cut into rounds, ease the rounds in a muffin tin that has been greased and lined with a generous amount of flour. Press into a cup shape. Use empty muffin cases to hold dried beans inside of the cups of pastry. Bake in the oven at 170 degrees Celsius for 15 – 20 minutes until crisp and light.


Remove the beans and muffin cases, set to one side. Fill the baked cases halfway with jam or even nutella. Return the muffin tin to the oven for a further 5-7 minutes until the filling has warmed through. Remove the tray from the oven and use the bake of a spoon or spatula to spread out the filling evenly. Leave to cool to room temperature before enjoying

Raspberry Bakewell Tart Recipe

Raspberry Bakewell tart with shortcrust pastry and almonds


Serves 10-12 Adults

Ingredients
• 1 roll premade shortcrust pastry
• 125g butter
• 150g caster sugar
• 3 medium eggs
• 125g self raising flour
• 125g ground almonds
• 2-3 drops almond flavouring
• 200g raspberry jam
• 125g flaked almonds

Method

1. Preheat the fan oven to 160 degrees Celsius.

2. Line a baking tin with the pastry. Patch up any holes – you can see here that my roll of pastry wasn’t the right shape but that was grand. Prick the pastry, then line with some baking parchment. Pour some baking beans/dried beans/clean coins into the baking parchment. Spread evenly. Bake in the oven for 15 minutes. After 15 minutes remove from the oven and set the tray to one side while you prepare the filling.

3. Using an electric mixer, beat together the butter and sugar until combined, then add the eggs. Beat again. Next add the flour and ground almonds, followed by the almond flavouring. You will be left with a stiff batter.

4. Spoon the raspberry jam into the par-baked pastry case, spread evenly. Gently spoon the cake batter on top, making sure there are no gaps in the tart for the jam to escape.

5. Smooth the top of the cake batter. Sprinkle the flaked almonds on top of the cake batter and gently press the almonds onto the top so that they stick to the batter.

6. Bake in the oven for 35-40 minutes until the cake area is cooked through. It should be golden on top and if you use a skewer or a cocktail stick to test, it should come out clean.

7. Remove the tart from the oven and leave it to sit to one side for at least 15 minutes before removing from the tin, slicing, and serving.

8. Enjoy with lashings of tea, maybe some cream on the side.

Recipe Notes:
Yes this freezes so it’s a perfect make in advance tart.
Use whatever jam you prefer.
I only use free range eggs because that’s my preference.
The tin I use here is 30cm x 12cm with a removable base.
If you have a nut allergy you can substitute the 125g of ground almonds for more self raising flour. Do not use the almond flavouring

Focaccia


Ingredients
• 250g strong white flour
• 1 teaspoon dried yeast
• 1/2 teaspoon salt
• 20ml olive oil (plus more for the top of the focaccia)
• 100ml water
• Dried herbs of your choice


Method
Put the flour, yeast and salt into a large bowl and stir loosely with a fork. Add the olive oil and mix in well until you get a very loose breadcrumb texture. Add 75ml of water (cold or room temperature is fine, don’t use warm) and mix into the flour. You’re aiming for a loose, wet dough. If you have a stand mixer make the most of the dough hook. If not, rub a little oil on your hands before mixing so that the dough doesn’t stick. Add the remaining water bit by bit. The dough is very loose and slack. Knead it well until smooth, this will take about 20 minutes by hand or 10 with a stand mixer.
Grease a large bowl with some oil and put the dough inside, then cover the top with cling film. Leave the dough in a dark spot, not too warm, to rise for about 3 hours or so. It nearly needs to over-prove to get the irregular air bubbles when you bake it.
Take a ceramic baking dish (mine is 20cm square), lightly oil it and dust with a little flour. Preheat a (fan) oven to 200 degrees Celsius. Gently turn the dough out of the bowl directly into the dish and use your knuckles to pad it into the corners, the knuckles will give it the lumpy surface. Sprinkle the top with dried herbs of your choice (I used rosemary and thyme and some dried garlic), then spoon a little olive oil over the herbs so that it pools in the shallow parts of the dough.
Once the oven is up to temperature, bake the bread in the oven until golden brown on top. This should take about 25-30 minutes. Leave to cool in the dish for at least 15 minutes before turning out onto a cooling rack

Swiss Roll Recipe


*Note this is probably the only recipe where I use imperial measurements as this is a legacy recipe from both my grandmothers.


The ratio for making fatless sponge is 1 egg:
1 oz caster sugar: 1 oz self raising flour and a tiny amount of vanilla extract at the end. You increase the quantities to get more sponge.
This makes it very adaptable to whatever you are baking.
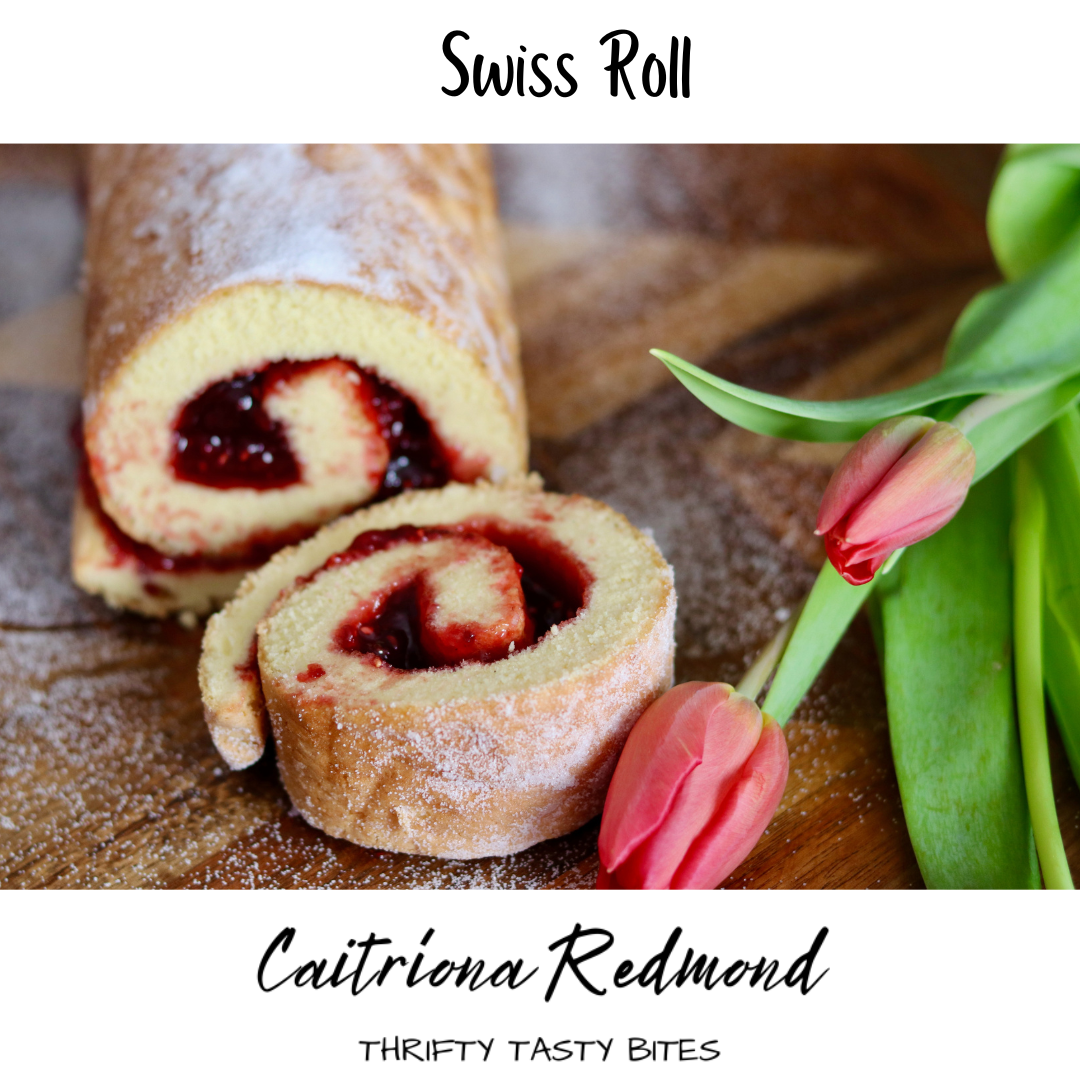
For the sponge you see today this is what I used…


Ingredients
5 medium eggs
5 oz caster sugar
5 oz self raising flour
1/2 teaspoon vanilla extract
For the filling: 200g of raspberry jam Additional caster sugar for rolling the sponge


Method
Preheat your oven to 170 degrees celcius. Line your tin with baking parchment, ensuring that there is plenty of overlap.
Put the eggs and sugar into the mixer and using the whisk attachment whisk until pale, light and fluffy. Its volume should at least double in size. Turn off the mixer and sieve the flour/baking powder directly onto the baking parchment.
Now gently pour half the flour into the egg/sugar mixture and fold with the metal spoon. Taking care not to knock the air out. Repeat with the remaining flour.
Pour the mixture into the lined baking tray. Bake in the oven for approximately 22 mins or until golden.
Remove from the oven when baked and leave to cool for 5 mins on a cooling rack.
Sprinkle a piece of baking parchment with caster sugar and tip the sponge upside down on top of the sugar. Next peel off the baking parchment gently.
Taking the edge of the baking parchment together in your hands, tightly roll together until you reach the short edge of the sponge.
This part is not unlike rolling sushi. Use the teatowel/parchment to force the sponge to roll onto itself tightly.
Keep on rolling until you reach the end of the sponge. Now cover the sponge with the parchment, then the damp teatowel and twist like a Christmas Cracker.
Leave the roll to cool for approximately 15 mins before filling with jam, serve and eat on the day that it is baked for best results